This week I found some time to work again of this Zelda: Link’s Awakening disassembly project. And it got quite a few improvements done!
The various graphics used in the game are stored in the ROM as binary files. Until recently, the binary sections containing the pictures weren’t even entirely identified.
This week, the remaining graphic banks were all mapped out, and all of them are now exported as PNG files. When compiling the game, the PNG files are converted back to their original 2bpp format, and inserted into the final binary.
For now, most of the pictures are exported as large sheets containing multiple graphical elements. For instance, this is a portion of the graphics sheet for the dungeons graphics.
Of course, it is possible to split these elements into individual items. But for now only a minority some background tiles and sprites are split up individually.
There is still work to do there.
You’ll also notice that most of the graphics are actually stored twice. Now remember that Zelda DX is actually a port on the Game Boy Color of the original “Zelda:Link’s Awakening”, which was initially released on the original monochrome Game Boy. However the remake could still run on the original Game Boy.
So it seems that during the development of the Game Boy Color remake, Nintendo’s developers duplicated all the graphics. This allowed them to tweak the graphics for the color edition—while leaving the original grayscale elements intact when running on a Game Boy or Game Boy Pocket.
You can see below some slight differences of graphics between the original graphics and colored ones.

N.B. All graphics, colored or not, are stored as grayscale images. Color is applied at runtime, using external palette data. This is what allows an identical piece of graphics to get various colors, depending on the context it is used.
Although the gameplay and story of the remake were the same than in the original game, some elements exclusive to the Game Boy Color were added. A notable one is the appearance of a photographer, which will sometime appear during the game to take a picture of Link’s adventures.
Good news: these pictures have been extracted too! However they are often compressed in some way. Space on a cartridge isn’t cheap, and was to be used with precaution. Also the photography scenes sometime contain moving parts and dynamic elements—which had to be encoded into the picture somehow.
This is why, although some of these pictures are recognizable, many of them look like garbled content, or a mixture of different items.
Disassembling the game is mostly about making sense of a bunch of machine code. And one of the most used technique is to reconstruct the labels and comments of the source code.
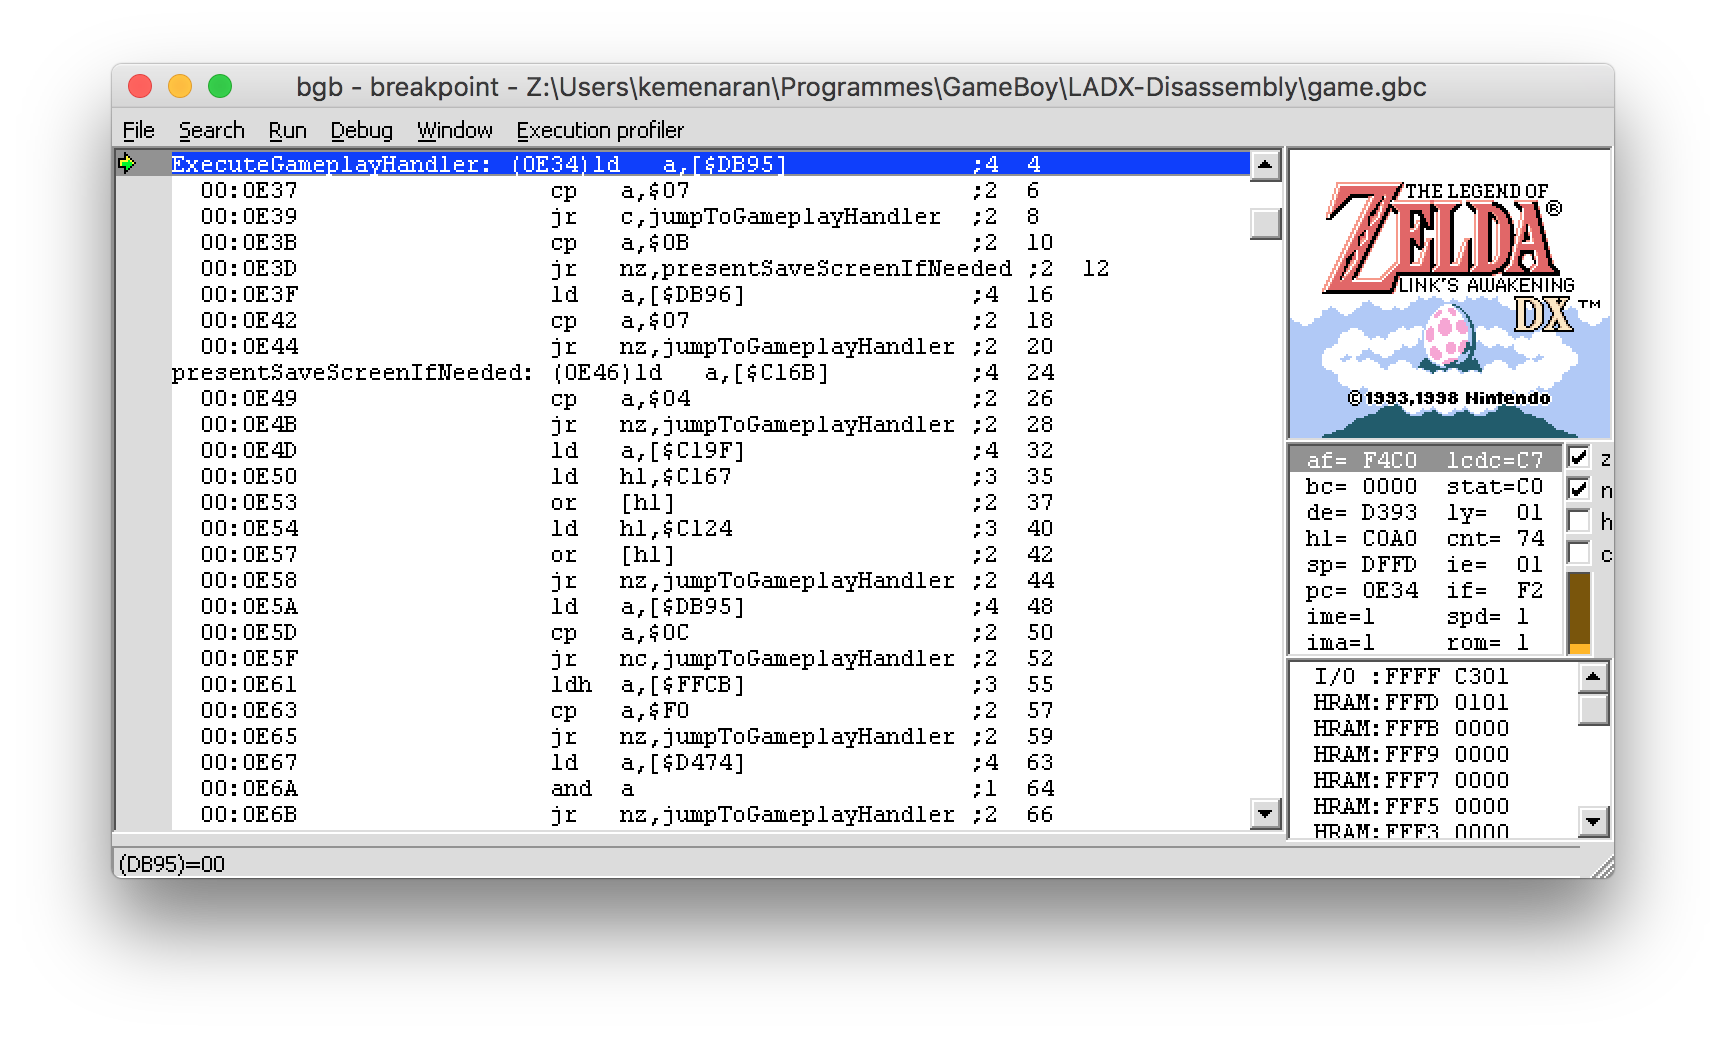
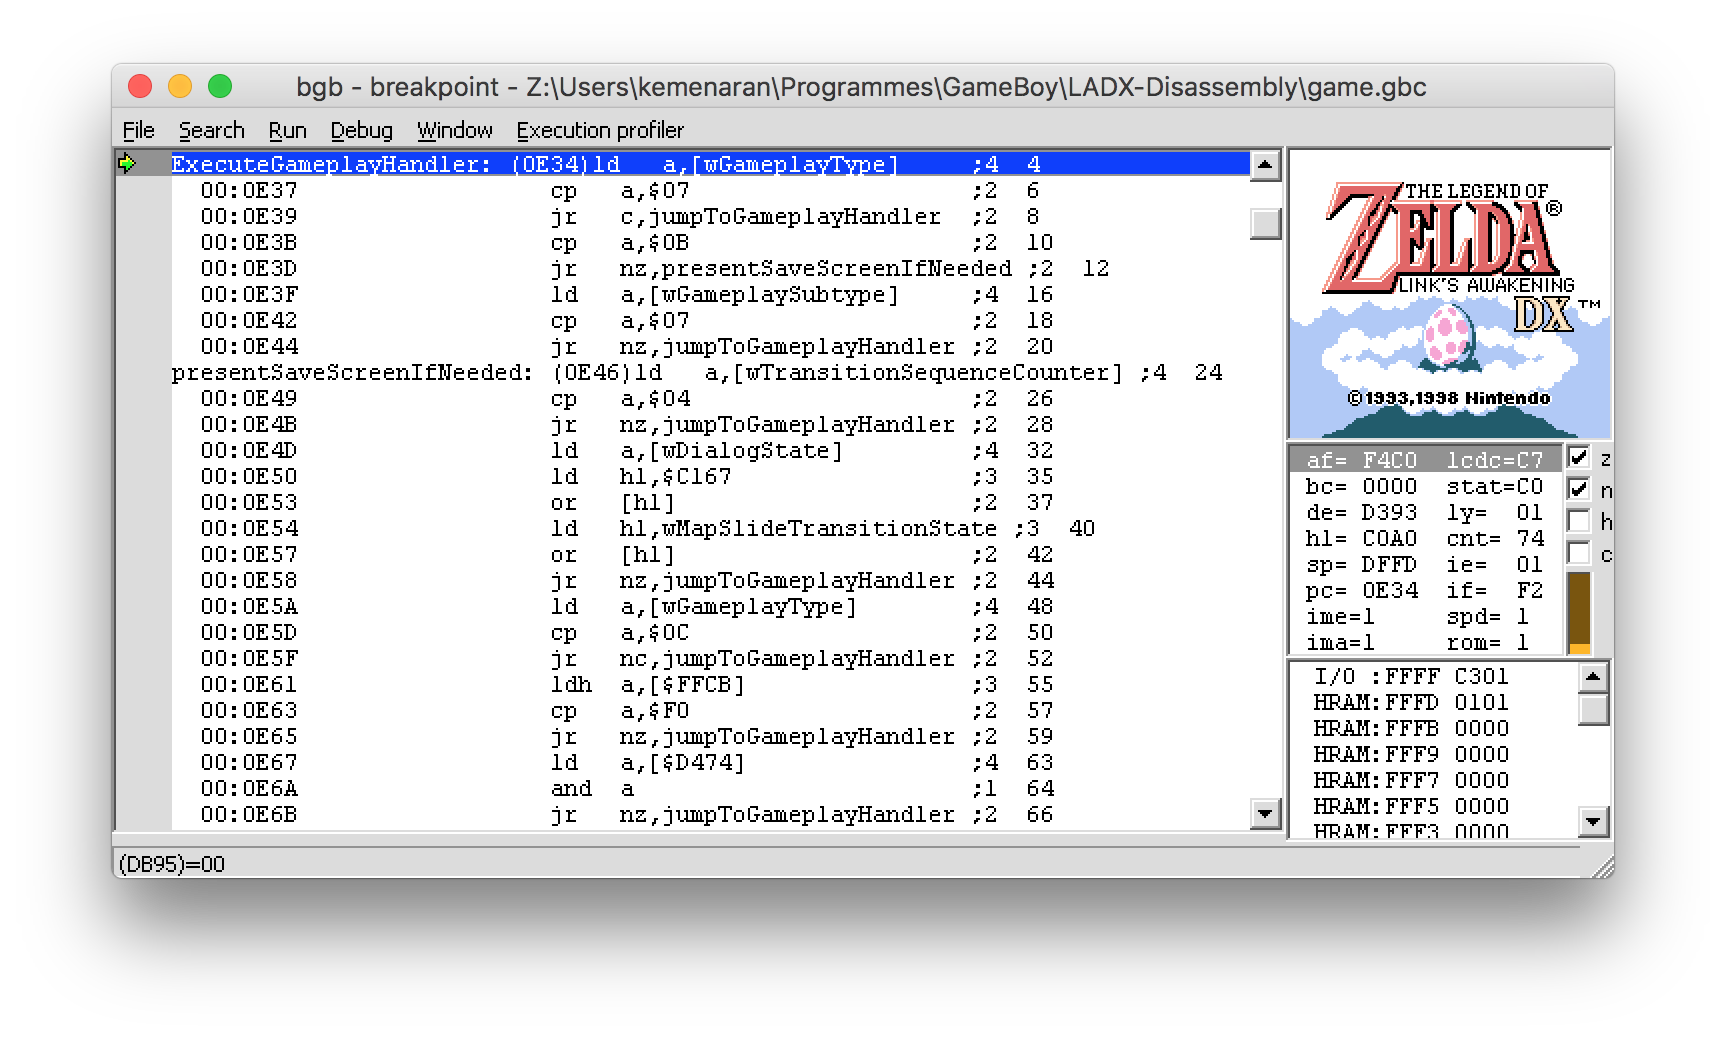
One good thing about labeling the different parts of the disassembled code is that they’ll get exported into debug symbols. These debug symbols can be read by emulators, debuggers, and other different tools to give meaning to the game code. The more we label, the more we can use these labels to progress further.
But until now, only function labels were exported into debug symbols. But how about the memory location labels, which indicate how are used some specific part of the memory, and are almost as important as function labels? Well, due to the way they were labeled in the disassembly, memory labels were not exported at all.
This week the declaration of the memory labels was rewritten, so that they get exported into the debug symbols. Which means for instance that memory locations now show up in the debugger! This will definitely make reverse-engineering easier in the future.


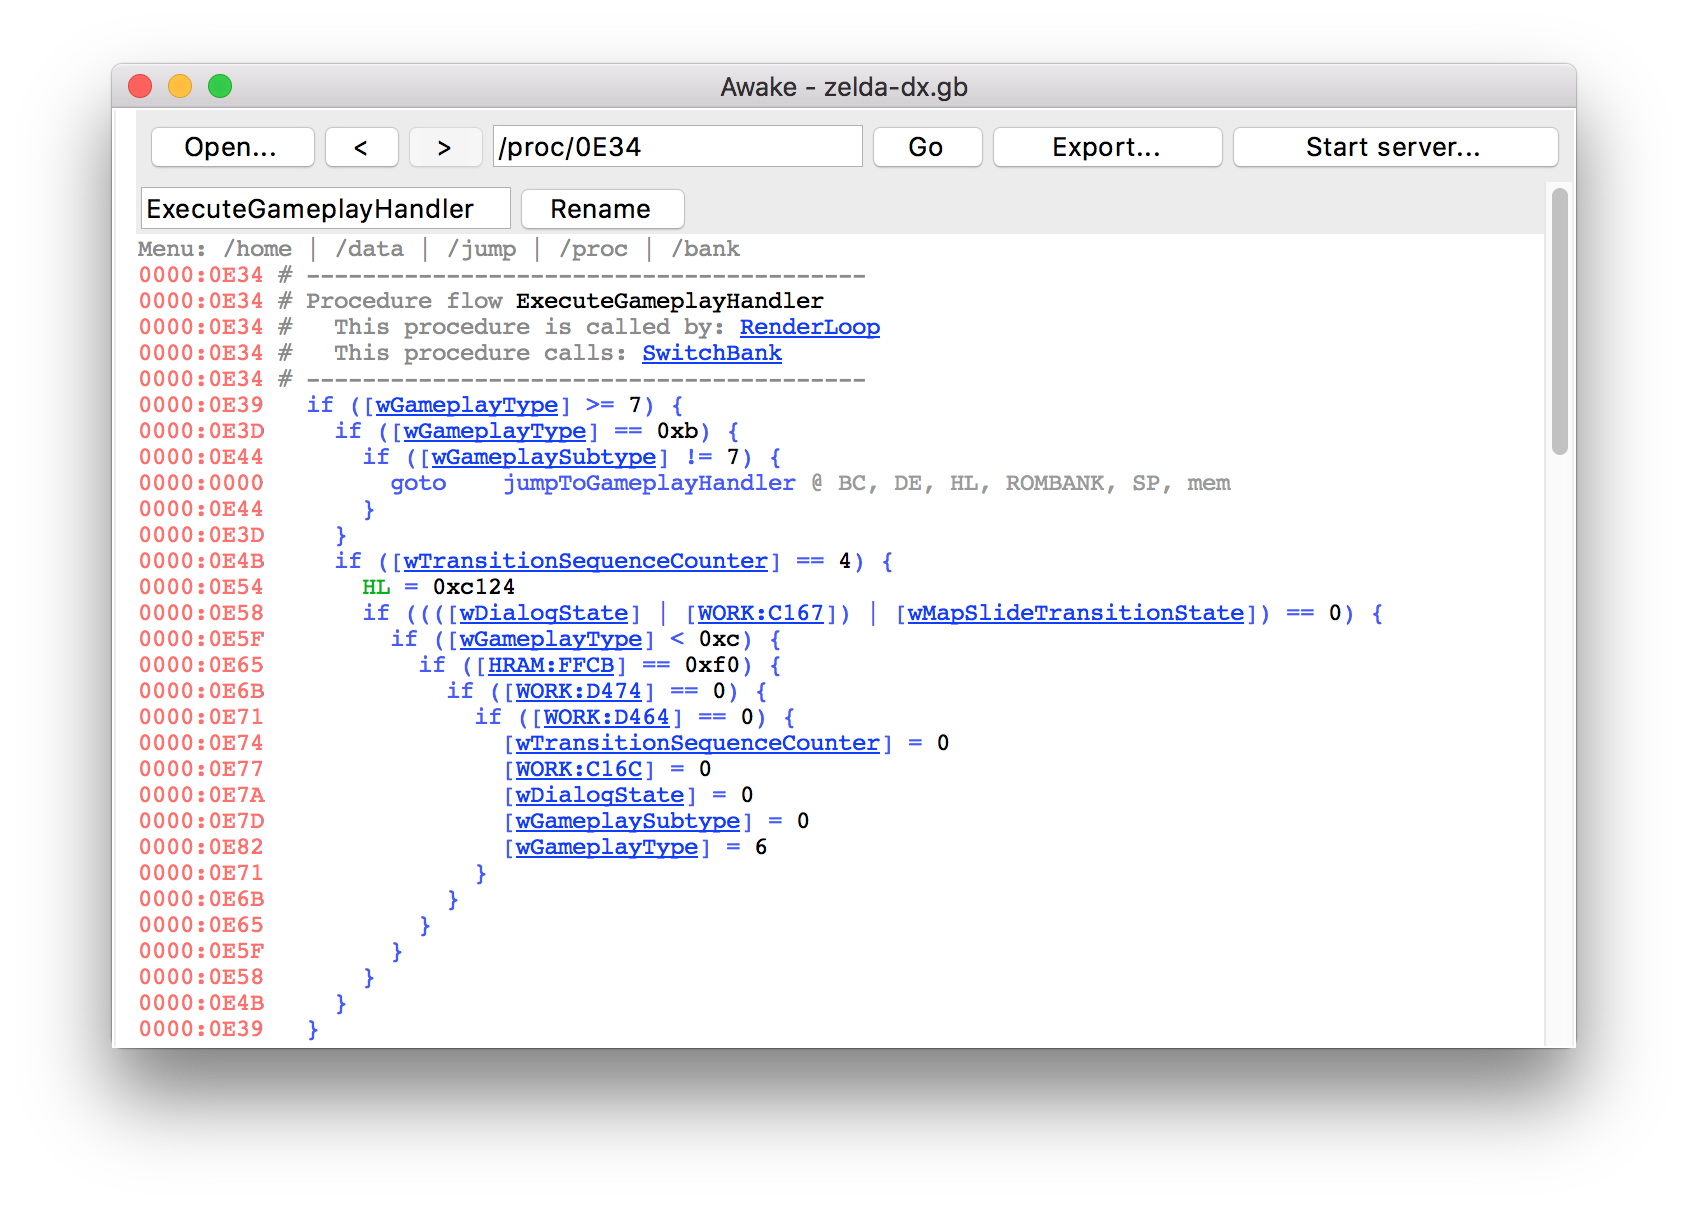
A few years ago, Github user @devdri started working on a tool to help the Game Boy games disassembling efforts : a custom Game Boy decompiler named awake.
The idea is to present the game code into a nice user interface, which allows browsing the code and jumping back and forth easily. It also features many heuristics to make sense of the assembly code: detecting the start and end of procedures, exposing jump tables, and displaying the assembly code as high-level C-style expressions.
Although this project hasn’t been active for the past few years, it seems it could be quite useful on its own. A few missing features would be a nice improvement to this tool though.
So this week I added support for labeling functions and memory locations from the UI. Support for importing debug symbols is also coming soon. Hopefully this will make awake a worthwhile tool for understanding the disassembled code.

It’s not easy to jump into a new project. How is the game even compiled? Do I need a custom toolchain? What are the tools used to explore the code and graphics?
Fortunately some guides are now included in the project README file. You’ll get a quick overview on how to use a debugger to label code, and how the scripts used to extract the graphics data work.
For the next weeks I would like to:
awake to label some code, and see how it could be improved ;bank0.asm) into separate files ;And we’ll see how it goes.